Showing posts with label painting. Show all posts

Monday, April 7, 2014

Day 28-32 - Harder Than It Looks!

Friday
The installers were back at it Friday to finish laying the laminate floor.   They had poured a few areas with self-leveling concrete on Wednesday to even out the sub floor.  But by Friday, a few areas were still not completely dry and set.  They'd never seen that happen before and even called the  local sales rep for the product to come out to take a look.  Not wanting moisture to seep into our new flooring, they came back Monday to do the last two areas that still were showing moisture from the drying concrete on Friday.  We are very happy with the floors!  Here are some before and after shots - excuse the dirt. The walls in the hallway look kind of yellow in the photos, but they are the Autumn Mist color that is in most of the house.


Saturday & Sunday
Guess what!  I got to paint more!  Thrilling stuff folks.  But it is nice to have fresh paint everywhere.  Over the weekend I focused on painting inside all the storage closets - hallway linen, over the stairs,  master bath linen, coat closet and pantry.  We're using a semi-gloss white paint for all closet interiors and doors to help cover wear and tear.  I've never really painted with semi-gloss before, but let me tell you, it is slick!  The first coat I put on looked like a two year old had painted it.  I rolled, then cut and the paintbrush took more paint off than it put on.  The second coat went on much better.  And now the closets looks so fresh it made it worth the time I spent painting in places most people will never see! 

There's a neat storage closet on the upstairs landing that goes over the stairway.  I didn't realize it until I climbed inside to paint it but that thing is huge!  I stood straight up inside it so it's at least 5'3" tall and about 4 feet deep.  I'll be honest, while I was standing inside it painting I thought to myself, "I think we'll use this closet to store extra bedding.  Then as soon as Maria is old enough to really play hide-and-seek, I'm totally hiding in here!"  It's true, I'm still 10 years old at heart. 

Daniel sanded, primed and painted all the cabinet doors and drawers.  It was fairly nice outside so he was able to work on the covered patio.  I can't wait to open all the windows at the house when it gets closer to 70 later this week!

Monday
We're finally ready to start reassembling the kitchen.  As much as we would have loved new counters and cabinets for the kitchen, for now we are making the old ones work with just some sprucing.  Unfortunately, the drawers are in pretty bad shape.  One was actually supported by duct tape on the bottom...  Yikes.

 But we can make it work - it's what we do.  When we brought the doors back in to start reattaching them, we made an unfortunate discovery.  Somehow, when we detached the doors from the hinges, we broke the pin that held the two pieces of the hinge together.  It was a hidden hinge, but an outdated design.  After a quick trip to Home Depot, we found that the only hidden hinges available in the store now were the kind that require a cut out in the doors for the hinge.  Of course these ancient doors don't have the cut out so we had to put up visible hinges.

I'll be honest, I kind of assumed that to hang a cabinet door you just screwed the hinge to the door, then held that sucker up to the frame and screwed down the hinge.  Yeah, not so much.  It's a lot more difficult than I thought it would be!  Those hinges were tricky to get just right.  You'd think it was lined up, but it wasn't flush against the wood or the top was right but the bottom slid out of place.  Goodness.  The first three doors were tough, but Daniel got pretty good at it after that.  We banged up our paint job pretty bad so I will need to touch that up this week.

Daniel's dad had wired all the ceiling fans for us but left off the blades so we could paint the ceilings around the fan bases.  Attaching the blades was another job that turned out trickier than I would have thought.  There's very little space to work with the screws that attach the blades to the unit, and of course I kept dropping the screws.  I did get one fan finished though.  I love that I'll get to have a ceiling fan in the kitchen!
We're starting Maria off in the "family business" of home remodeling early.  I had her at the house for a bit before I took her to a friend who offered to babysit.  She "helped" me touch up the paint on the cabinets.  During the process, she managed to almost stick her hand in the paint bucket, eat my hair, and grabbed a paper towel for a pre-dinner snack before I got it from her.  Needless to say working on the house is much easier when she's with someone else!  But hopefully we can instill a good work ethic in her from the start.  You've got to work for the things you want and sometimes that means holding a baby in one arm while you paint with the other!

Keep dreaming my fellow DIY-ers!

Tuesday, April 1, 2014

Days 22-24 - Power Tool Convert

Saturday
I have a confession - I've been avoiding the blog.  These last few days have been, well, a little frustrating.  I avoided writing any new posts so I wouldn't have to admit it out loud!  But it's the truth and anyone who's done any remodeling to their home knows that some days just kind of stink.  Sometimes it gets hard and you think to yourself, "Will this ever end?"

Saturday we went to the house with the goal of getting one bathroom up and running - the guest bath.  Daniel had already laid the floor so all we needed to do was get the trim boards in and install the toilet and vanity.  No problem, right? So we thought.
We are putting white trim boards throughout the house.  While vacationing with his family in Branson, MO, Daniel convinced me he really needed a new saw - a Rigid 10" sliding miter saw - that was on a great sale at the Tanger factory outlet store.  Getting it home was interesting since he also had to get the giant stand with it, but we made it work.  Well I'm glad we got it now!  It works great for cutting the trim boards at a much more precise angle than his old saw.  I tried my hand at it.  One thing I learned, test to see where the blade is actually going to come down before cutting - don't trust the laser!

I worked on (in my opinion) the nastiest thing in the bathroom, the wax ring for the toilet. That thing seriously grosses me out.  However, it had to be done.  So I scraped up the old wax ring to ready the flange for the new ring.  The flange had a screw missing but I didn't think too much of it because I assumed it kind of all sealed together once the weight of the toilet was on it.  We kept the existing toilet because it was relatively new and just needed a good cleaning.  In our last house, the plumbing had been winterized two years before we bought it.  I scrubbed those toilets more times than I can count before the ring from the winterizing chemicals came out.  So I can handle a dirty toilet any day. 

Anyways we got the new toilet set with the new wax ring in place.  However, there was way too much wiggle in the unit after we had tightened the nuts to hold it in place.  This was probably my fault for not speaking up about the loose/missing screws in the flange.  Daniel flushed it a few times and no water appeared to be leaking so we went downstairs.  That's when I heard it.  A drip, drip drip was coming from inside the wall we had just replaced with new drywall in the powder room which is directly above that bathroom.  It sounds like we may have a leak.  I think I might cry if we have to rip out that beautiful fresh wall that was just textured and painted...  But we aren't sure so  our plumber is coming out on Tuesday.  It's possible the dripping sound was just inside the pipe and not actually dripping inside the wall.  I'm praying that's it!  We turned off the water and took the toilet back up.  To be safe, we are having the plumber install the toilet and vanity in this bathroom so he can check things out.

Sunday
Daniel worked on painting the doors of the built in linen closets above the stairs and in the master bath as well as the stringers on the stairs.  The wood was sanded down and primed, then sprayed with a semi gloss white paint.  Apparently the semi gloss is supposed to hold up better against wear and tear so it's what we will be using on all the doors in the house.  The carpet will cover over the edge of the steps.  We're still deciding what we want to do with the existing balusters and handrail.  Right now it's a bit dangerous at the top of the stairs with just a gaping opening since the banisters on the landing were removed by the previous owners.  So we will either paint or replace the existing pieces on the bottom half of the stairs, depending on what we find for the upstairs banisters. 


I guess what was frustrating about those two days is it just felt like not much progress was made.  The one major thing we tried to accomplish didn't go over well, and now we're worried about a leak.  We're starting to really feel anxious to move into the house.  There's so many of these small things (like painting a closet) we could do even easier if we lived there.  So hopefully we'll get to a place soon where we've achieved a livable status!

Monday
Today was exciting because I got to try something new - tiling!  Daniel is pretty good at tiling and has done it quite a bit.  That's how he convinced me to buy a new Rigid 7" tile saw on sale at Home Depot a year or so ago even though he had no projects going at the time.  It's turning out to be another good tool investment.  This new saw gives a pretty clean and accurate cut on the tile from the Restore for our master bath shower walls.  We decided to add a small accent row of the fancy glass tile from Home Depot.  We only needed 4 sheets of the accent tile, but those 4 sheets actually cost more than all the boxes of full-sized tile for the shower walls from the Restore.  I don't regret spending the extra money for the glass tile, but I do think it's kind of funny when you compare the cost.  That's why we shop Restore!  I'm loving how it's turning out and love it even more knowing I helped put it up.
I'll post another photo after we've grouted because that always makes a huge difference.  The only downside of this shower, no cut outs or ledges for all our soaps.  The existing walls just didn't really allow for it without going to a lot of trouble.  No worries though, I know I can get some handy suction caddies to hold our stuff.  Those ledges and cutouts just look prettier.  The tile will go all the way to the ceiling and I think it's going to look awesome!

I think Daniel is loving that I'm into our renovation project so much.  Before, when he would talk about wanting a new tool, I would always go through the whole spiel of, "Do you really need that?  Why can't you just use this tool you already have?  What specifically are you going to use that for?"  But now, I'm thinking, "Yeah we definitely need a table saw.  Maybe we could get one for our anniversary in May?  I'll have to watch the sale papers..."  It's a whole new me!  Congratulations babe, you've converted me.  Now that I see the difference that the right quality tool can make, I'm hooked.

The more I learn to do, the more I dream of doing!

Wednesday, March 26, 2014

Day 19 - House of Doors

Wednesday
All future overnight guests of Casa del Goodwin will be pleased to know that we now have doors for each room!  You may not have noticed in the original photos that were taken before we closed, but there were hardly any doors in the entire house.  Most of the bedrooms had blankets hung on nails for privacy and the closets were either open or had a blanket tacked up there as well.  The few doors that were there were not the style we would have wanted anyways so all doors are being replaced.

We chose the 6-panel door design for the interior doors.  Perhaps it was just wishful thinking but looking at these doors in the store, we kind of thought they were already painted white.  Turns out they are just primed to be painted.  When placed up against the very white door casing, they look more off-white or grayish.  Hey, another thing for me to paint!  The hardware on the doors will be satin nickel handles.  Here's a photo of two bedroom doors and the handle for the front door:
The closet doors will be installed Thursday so Daniel is painting the casings white tonight.  Apparently the slider type closet doors don't come with a casing so we'll be using the existing frames.  Those casings are one of the few original things that will remain in the house I guess!

I stopped at TJMaxx to check out their clearance shelves for decor items.  I found two lamps that I liked for the living room.  Unfortunately, the living room was designed (as most are) without any overhead lighting.  While I'm adding "canned lighting" to the wish list as we speak, for now we will need lamps to see when the sun goes down.  Plus lamps are just a stylish to almost any room I think.  Here's the two I found, and I'm hoping to find the matching floor lamp online.  The photo is a bit blurry.  I liked the brushed silver base with the neutral gray shades.  Going for clean classic styles in this room - I guess I'm not very funky.
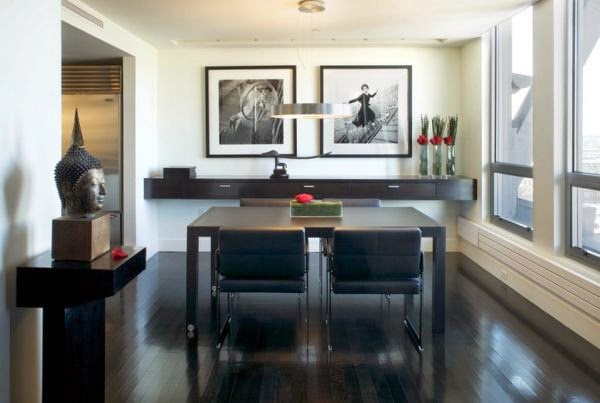
Speaking of decor, I loved the ideas I got from everyone who responded to Tuesday's post both in the post comments and on the Facebook link!  I think I'll keep the decor gray walls with black and white in the dining room with just one or two pops of red.  I don't think an accent wall would look as good once we put in the wainscoting - a project for after we move in.  I liked these examples of monochromatic rooms with just one or two pieces in color.  Red is my favorite color so that will probably be our "pop" in the dining room and at least one of the bathrooms.  Of course the style of furniture in the dining room pictured below is more contemporary than anything I own.  After all this remodeling, our old furniture is just going to have to keep holding up for a good long while.

The biggest thing on my mind now for decor is window coverings.  If money was no object, we'd live in a house with enough trees and privacy around it that I would never cover the windows.  In fact, that's pretty much what we did in our old house.  The way it was situated on a hill higher than any of the other houses with our bedroom windows facing the large backyard, I rarely closed most of the blinds.  Sure, folks may have gotten a surprising view occasionally, but that's what good neighbors are for, right?

So what are your preferred type of window coverings?  Wood blinds, Cellular Shades, Vertical Blinds, Aluminum Blinds, Roller Shades, Curtains with or without blinds - so many options!  Keep in mind, I like things that are easy to clean and maintain (what mom doesn't?).  And soon enough, little toddler hands will start exploring whatever I put on the windows.  What do you like best?

Soon we'll have those windows covered to keep the summer sun from waking us up too early so we can keep on dreaming!

Day 18 - What would YOU do?

Tuesday
I think my hand is soon going to be permanently scrunched in a "brush-holding" position.  I guess that's what happens when you've been painting for six days in a row.  On the bright side, we are ALMOST done!  Daniel's brother Josh was so kind to come over again last night to help while his wife and girls babysat Maria.  He got the second coat rolled in the dining room and bathrooms.  He's an awesome brother!
I just have to get a few more rooms cut and then I can be done painting for a while, hallelujah!  And the good news is, I got the scary job over with.  My least favorite thing to paint is the stairway due to having to climb up high on a ladder to paint.  It always freaks me out.  I never used to be afraid of heights but the older I get... yeah, I was a little nervous.  I couldn't help envisioning losing my balance just enough to throw the paint tray I was holding all over the new carpet on the upstairs landing.  That would have been very upsetting.  Fortunately I kept my balance and all went well.
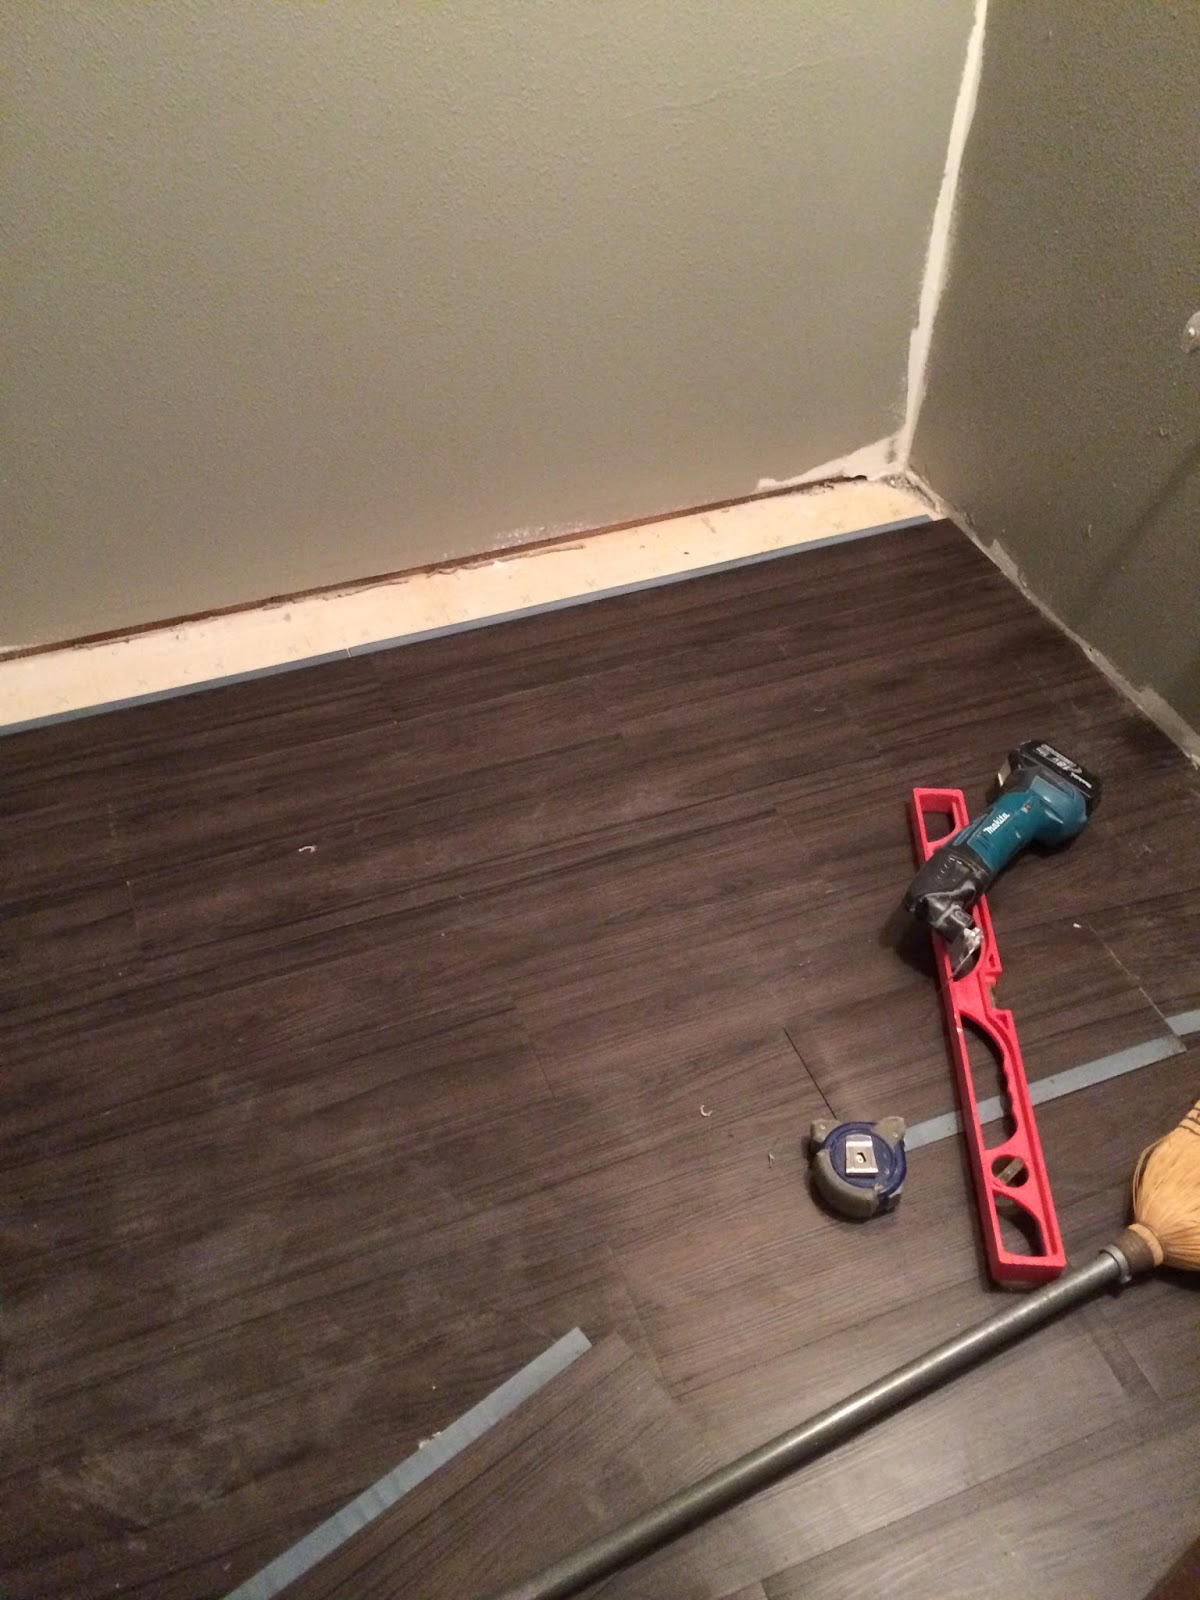
Daniel worked on installing the flooring in the guest bathroom.  We typically tile in the bathrooms - Daniel is awesome at tiling - but couldn't find a tile we loved so decided to try something different.  The Restore had boxes of Allure Vinyl Plank flooring in "Iron Wood" color.  I'm usually not a big fan of vinyl flooring but this looked kind of cool and modern.  My biggest complaint about bathroom floors is how cold it is in the morning.  This seemed like it would be a bit warmer than tile so we thought we'd give it a try.  If we hate it, we can always pull it up later and tile.  So far I think it looks neat, and it's definitely "softer" and warmer than tile. 

So now I'd like to ask for YOUR opinion.  In our gray rooms, how would you decorate?  Would you stick to a mostly monochromatic theme or do a bold color to offset the gray?  The dining room will have white wainscoting eventually with a medium dark Pergo floor.  The bathrooms have the gray walls with white trim and now you can see the flooring color in the upstairs baths. 

I have a small painting that I bought from a street artist in London back in 2009.  It's a white canvas with a black outline-type painting of a couple walking down the street with Big Ben up ahead.  They are holding a bright red umbrella.  It caught my eye because of the splash of red on the black and white canvas.  Perhaps there's something there to work with.  What would you do? 

I look forward to hearing your thoughts to help us keep dreaming!

Tuesday, March 25, 2014

Day 17 - Stony Gray Beagle

Monday
New flooring install has begun!  The installers began laying the new carpet in the living room, office and second floor.  Since the laminate floors won't be installed until Wednesday, they will be coming back on Thursday to carpet the stairs and tuck the carpet edges properly everywhere it meets the laminate.  We chose a frieze carpet with a tan/brown fleck called Custard.  We installed this carpet into the old house right before we sold it.  I'm looking forward to getting to enjoy this new carpet a little longer!  Here's a picture from the upstairs landing.
Daniel and I headed to the house after dinner to keep up on the painting work.  Daniel rolled the kitchen, put a second coat on the entryway hall, and cracked open the Stony Gray paint to roll the dining room and half bath.  I was a little worried when he opened it because of how blue it looked!  But it just needed stirred.  I think it looks pretty nice!  We will be adding a white wainscoting to the bottom half of the dining room wall after we move in.  But that's a project for another day and another post.
I worked on cutting the hallway and office while he rolled.  The nice thing about no trim boards in the house is only having to cut in by the ceiling and in the corners.  I hate taping so I just do it freehand.  After painting so many rooms at the old house, I've gotten relatively good at it.  As you might recall, I had forgotten to cover the one ceiling fan in the house we are keeping before the texture guys did their thing.  So I spent about 30 minutes just cleaning the texture spray off of every square centimeter of that ceiling fan.  Fun!  Ah well, lesson learned.  I won't forget to cover it in the next house.

I knew it would happen at some point, and tonight was the night!  One of our dogs leaned up against a freshly painted wall.  Here's Venus wearing the latest color from our spring line, Stony Gray.

When Daniel took off some plastic in the kitchen, I got a good look at the cabinets he'd been painting at night after I was already home with Maria. I'm loving the color!  We are going to tile the counter tops as well to save some money.  Eventually we may install new counters but we'll see.  Tile will certainly be an improvement to the cheap Formica that is currently there.  We need to do a second coat of Espresso on the cabinets, just to make sure it holds up against the wear and tear of using the kitchen.
As soon as we get the painting done (just have some cutting and the two bathrooms upstairs left), we can work on putting the bathrooms together.  I'm looking forward to that!  As of right now, you just have to make sure you don't drink too much before you come work at the house...  Enough said.

Until next time, keep dreaming!

Saturday, March 22, 2014

Day 16 - Now THAT'S how you clean a floor!

Saturday
Tonight my husband gets a back rub for all of his hard work on the house today.  We really wanted to get all of the areas that will be carpeted painted before Monday - the entire upstairs (minus the bathrooms) plus the living room and den on the first floor.  Lots of paint!  Thank goodness for Habitat Restore prices.  A 5-gallon bucket is around $55 which is much more affordable than the $20-$30 pricetag for one gallon at the hardware store.

Today Daniel and I (but mostly Daniel) worked on the following:
  • Finished spraying all the ceilings
  • Finished rolling paint on all bedrooms including inside the closets (cutting still in process)
  • Rolled the living room, den and entryway
  • Daniel's dad got the entry way and upstairs landing lights installed (pics to follow as I forgot to take them today)
I spent some time just cleaning up as well.  All the plastic that covered our windows and furniture needed removed.  It was covered in the texture and made a giant mess on both me and the floors when pulled down.  I threw it away in the dumpster.  Now the top layer of trash is all that painters plastic.  This may make the dumpster hauling truck an interesting site going down the road... I hope it doesn't all blow out!  That would make for a serious littering fine.

Unfortunately, today was a tough day for scheduling with Maria.  As I mentioned, our go-to babysitter had something come up that kept her busy most of the day.  I was able to work at the house from about 10:30-1:30, but that was it.  Sometimes, you just have to be the mommy.

My biggest challenge of the day was getting all those floors cleaned.  To be honest, I had no idea how to really get them clean.  Do I sweep, vacuum, mop, scrub?  I just wasn't sure what would work.  But this morning on the way to the house, something wonderful happened.  Daniel got a call from a friend offering to help clean the floors.  He's a pro when it comes to floor cleaning - literally, it's his profession.

He came by the house around 11 to look at the project, then returned with his work van.  He's got some serious equipment in there.
He ran that giant blue hose into the house and went to work on the upstairs bedrooms.  You won't believe the difference that machine made!
Here's a before and after shot of the nursery floor:

So obviously that cleaning equipment (plus the operator!) worked a miracle for us.  A GIANT thank you to our friend Rodney for his amazing work.  Seriously, he took a load of stress off my plate.  And it was thanks to the blog that he knew of our need.  Guess this thing really came in handy for us!

As you can see, the bedrooms had hardwood floors under the carpet.  While in the future we may consider refinishing them, right now it's just more work than we can handle.  They're pretty beat up and badly stained which would mean to LOTS of time spent sanding.  That's just not a project we're up for right now.  So carpet it will be for us come Monday.

By the way, after a second look today, I've decided I like the Autumn Mist color.  It's is a good thing too, considering how many rooms it's going in (almost all of them for now).  We're keeping it very neutral at this point.  Once we move in and I have some decor for the rooms, we may decide to change it up.  This will definitely do for now though, and I'm happy with it.  Looking forward to seeing how the Stony Gray paint looks in our bathrooms and dining room!

Until next time, keep dreaming!

Friday, March 21, 2014

Day 15 - Remodeling Stress

Friday
Ok so I have a confession to make - I'm stressed today!  Typically, I'm like an emotional rubber band.  Sure I get upset or riled up about things but I snap back to my normal self pretty quickly.  I don't let things get to me for long.  But today, I have to admit, I'm a little overwhelmed.

I didn't go to the house until after dinner today.  Due to some unforeseen complications, we were without a babysitter for Maria.  While it was nice to spend the whole day with her, it also meant I sat thinking about all the things that needed done at the house.  Thankfully Daniel's dad was able to go over in the afternoon and install the rest of the ceiling fans.  He's been a huge help getting that stuff taken care of while Daniel is at work!

To further complicate things, Daniel found out today that the carpet is being installed on Monday.  Monday.  As in the first day of next week.  We had thought it was scheduled for Tuesday, but I guess we wrote it down wrong.  If we delay the install, the next available date was April 2nd which is no bueno.  So Monday it has to be.

This means that all our rooms that will have carpet need to be painted before Monday - four bedrooms, upstairs landing, stairs, living room and office/den.  Also the floors in those rooms need scrubbed down as they are coated with lumps of texture and drywall mud.  Thus the cause of my distress.

Tonight we got all the ceilings on the 2nd floor and most of the 1st floor painted.  Daniel started rolling our actual color paint on the bedroom walls as well.  I just need to go in and do the cutting around the ceiling.  So we're not in bad shape.  Plus, if we really can't get it all done, it's not the end of the world.  Obviously people typically paint in rooms with carpet.  It's just so much easier when the floor is unfinished.  I can't even think about how I would feel if we accidentally kicked over a bucket on the brand new carpet.  (True story, an entire can of wood stain was knocked over in the basement of our old house on the off-white carpet.  It's still there.)

Another reason I'm feeling stressed is due to the actual paint itself.  Picking paint colors is worse than the actual job of painting to me.  I always worry, "What if I hate it after we've painted the whole room?!"  I'm not a great decorator, as you will soon see.  I don't have an eye for it so I don't trust my judgment on the subject.  Fortunately, we like to save money and therefore buy all our paint at the Habitat for Humanity Restore.  This is helpful to a paint-phobic such as myself because they only offer about 12 paint colors.  That keeps things pretty simple.  However, I still find myself doubting the color I picked!  It's called Autumn Mist, and we are going to use it in most of the house.  Again, trying to keep things simple, we planned on only using two neutral paint colors - a tan-ish color for most rooms and light gray in the bathrooms.  The Autumn Mist is looking a little more green than I was hoping for.  Here's a pic of it as Daniel looking adorable rolling it on and I'm standing in the doorway fretting.
Ah well, it's what we've got and we're sticking to it for now!  We'll see how it turns out.  On the bright side, I am very happy with the ceiling fans we picked for the bedrooms.  We are using all satin nickel fixtures in the house.  Our old house had a ton of outdated brass fixtures so I am THRILLED to have something more modern!  The blades are two-sided with a sort of light brown option and a dark wood option.  We decided to go with the dark side since the brown didn't match our furniture and the new trim will be white.
In conclusion, tonight I've discovered blogging is good for the soul!  After typing out tonight's post, I feel better - certainly less stressed.  So thanks for "listening" to my earlier rant.  It helped.  Thank goodness, for Daniel's sake!  I've found that stress makes me a bit of a mean wife, poor guy.  I'm embarrassed to admit it, but I snap a lot at him when I'm feeling overwhelmed.  He takes it in stride but I hate when I'm like that.  It's just not me.  

So now that I'm feeling back to my old chipper self, keep dreaming friends!  I know I will.

Thursday, March 20, 2014

Day 14 - New Makeup Routine!

Thursday
Today was a "make your shoulders ache" kind of a work day.  I went to the house before lunch, after lunch and after dinner to paint.  My top priority - get the ceilings upstairs painted so we can take out the old ceiling fans and install the new.

My #1 illumination expert was there to help me this afternoon.  He took down the bedroom ceiling fans while I painted.  Does your electrician wear cuff links on the job?  I didn't think so.  You can't buy this kind of class.
I went to Home Depot this morning to get some more roller covers for this job.  I asked the paint counter folks what type of nap roller I would need to paint the textured ceilings.  They suggested the 1/2 inch.  I had the 3/4 in. in my hand but put it back based on their recommendation.  I wish I hadn't.  I rolled the dark blue bedroom ceiling until my arms ached and could still see through the texture.  The roller just wasn't cutting it.

That afternoon I got smart.  I brought out Daniel's Wagner Spraystation paint sprayer to give it a go.  Since we are just going with flat white on the ceilings, I used the Killz primer for the job.  It's white and will seal out any smoke residue that might try to seep out later.  (Side note: The house no longer smells like cats OR smoke, hallelujah!  Now it just smells like a construction site.  We're getting there.)


The Killz is kind of thick, so I watered it down for the sprayer - about 3/4 primer and 1/4 hot water.  Not sure if using water that was hot made a difference but logically speaking, typically things mix better in hot water than they do in cold.  Worth a shot.  Whether that helped or not, spraying the ceilings worked great!  The key with the sprayer is to take your time.  It doesn't spray on thick so you've got to move slowly to cover the area adequately.  I used a stepladder in the beginning but then got tired of moving it every few minutes and just held the sprayer as high as I could reach over my head.  It got the job done!
By the end of tonight, all 4 bedroom ceilings and both bathroom ceilings upstairs were finished.  Daniel came that evening after band practice and rolled the walls of the bedrooms and baths with the primer.  The second floor is now ready to paint!

Being a busy DIY Renovation Mom, it can be hard to find time to take care of my appearance.  I've been learning to take shortcuts wherever I can.  Today I discovered a brand new makeup routine that saves me time by doing my makeup while I paint the ceiling.  Presto!  Ready for date night with the hubby!
White eyelashes, white highlights and white lipstick are in style, right?  Even my contacts have small flecks of paint...  After a long shower, I still don't have it all washed off...  FYI when I went back after dinner, I got slightly smarter and wore a mask.  My lungs and throat are thanking me for the break from the fumes.

Keep dreaming!

Day 13 - Let them eat paint!

Wednesday
The painting has officially commenced!  While the walls on the first floor will not be textured until Friday, the second floor is done and ready for some serious painting.  

First on the agenda was sealing the cement board that replaced the moldy drywall around the master bath. A small bucket of shower waterproofing paint runs you around $40.  They call it "paint" but I would liken it's consistency to that of rolling chocolate pudding on your walls.  Weird stuff.  It's also a vibrant turquoise color that dries into a dark green.  I rolled two coats onto the cement board to cover it thoroughly.  No mold should be growing in this shower!

We are quite pleased with the results of the texturing.  As I've mentioned, the ceilings were an outdated popcorn texture before.  We now have knockdown on the ceilings (on the left) and orange peel on the walls (blue bedroom wall shown on the right) that will camouflage the drywall repair we've done.

Today we got the walls of the master bathroom, bedroom and another bedroom rolled with the Killz primer.  Unfortunately I was only able to be at the house for a short time this afternoon or I would've gotten more done.  Ah well, a start is a start!  We buy the Killz in giant 5 gallon buckets and are on our second bucket already (the first bucket was used to cover half of the first floor).  Daniel has this neat mixing attachment for his drill that makes stirring these large buckets a breeze.  We use it for both mixing paint and drywall mud.  So much easier than the wooden stir sticks!

In case you're wondering about my extremely fashionable skirt in the photo above, here's a closer look from before I started working today.  I have paint "samples" from every paint job I've done in the past few years collected in various spots on this skirt.  It's my paint scrapbook!  I was excited to get a little turquoise addition from the sealer.  It's the little things people.
While I did a great job (if I do say so myself) getting the windows and furniture covered in plastic before the texturing, I didn't think to cover any light fixtures.  We will be keeping the office fan and dining room chandelier as both are fairly new and in great condition.  Well they were in great condition... now it looks like I will be spending some serious time cleaning the texture mud off of them.  Oops!
 

Tonight while looking through ceiling fan options online, Daniel pulls up a photo of a very small 24 inch fan and says, "Why would they even make a fan this small?  It looks like a fat mosquito!"  So there you have it folks.  Do not put a 24 inch ceiling fan in your home unless you want it to look like an obese insect landed on your ceiling.

Keep dreaming!